How to Change the REGION in Mi Phones
If you've installed custom ROM in your XiaoMi phone through TWRP then you cannot change the region from China to your Country and also the language in Themes App is Chinese. Moreover, Fonts and Ringtones option in Themes, APPS app is also not available
Pre-requisites:
- Adb and Mi Phone drivers installed on PC.
- Text editor Notepad++ installed on computer.
- TWRP Recovery installed on phone.
PROCEDURE:
- Switch Off your phone and phone in Recovery mode by pressing Power + Vol Up button OR in Fastboot mode by pressing Power + Vol Down button, then double click Flash.bat file from PC. Press y to proceed when prompted.
- Tap on MOUNT the check☑️ the SYSTEM option and uncheck ◻️ the last option which contain "Read only" text.
- Connect your phone to pc
- Open Command Prompt in Administrator mode and type
- adb pull /system/build.prop c:\
- Open c drive on pc and locate the build.prop file. Right click and edit with notepad ++
- Go to end of file text and add these two lines
- ro.miui.region=IN
- ro.miui.cust_variant=en
- Save the file and exit notepad++
- Switch to Command Prompt and type
- adb push c:\build.prop /system/build.prop
- Exit Command Prompt
- Tap back on phone and then tap Reboot and then Reboot to system
You are all Done...!!
###############################################
Aadhaar Services on SMS
Unique Identification Authority of India (UIDAI has introduced a service called “Aadhaar Services on SMS” which enables Aadhaar Number holders, who do not have access to internet/resident portal/m-Aadhaar etc. to use various Aadhaar services like Virtual ID generation/retrieval, Aadhaar lock/unlock, Biometric lock/unlock etc. through SMS.
Resident can avail these Aadhaar Services by sending an SMS from Registered Mobile to 1947 in the format mentioned below:
To Generate – Virtual ID
GVID<SPACE>Aadhaar-Number-last-4-digits
For example if the Aadhaar number is 1234-5678-9123 then
SMS – GVID 9123 and send it to 1947
SMS – GVID 9123 and send it to 1947
To Retrieve – Virtual ID
RVID<SPACE>Aadhaar-Number-last-4-digits
For example if the Aadhaar number is 1234-5678-9123 then
SMS – RVID 9123 and send it to 1947
SMS – RVID 9123 and send it to 1947
To Get OTP
If using Aadhaar Number: GETOTP<SPACE>Aadhaar-NUMBER-last-4-digits
For example if the Aadhaar number is 1234-5678-9123 then
SMS – GETOTP 9123 and send it to 1947
SMS – GETOTP 9123 and send it to 1947
If using Virtual ID: GETOTP<SPACE>Virtual ID-NUMBER-last-6-digits
For example if Virtual ID is 1234-1234-1234-9123 then
SMS – GETOTP 340123 and send it to 1947
SMS – GETOTP 340123 and send it to 1947
To Lock Aadhaar
2 SMS are required to be sent for this facility.
SMS 1 : GETOTP<SPACE>Aadhaar NUMBER-last-4-digits
SMS 2 : LOCKUID<SPACE>Aadhaar NUMBER-last 4-digits<SPACE>OTP-6-digits
For example if the Aadhaar number is 1234-5678-9123 then
SMS – GETOTP 9123 and send it to 1947
SMS – GETOTP 9123 and send it to 1947
If suppose you receive the OTP as "012345" then
SMS – LOCKUID 9123 012345 send it to 1947
SMS – LOCKUID 9123 012345 send it to 1947
Note:
(1) For locking Aadhaar Number, Virtual ID is required to be pre-generated else it you would not be allowed to Lock
2) In case of multiple dependent Aadhaar Numbers linked to same mobile number, and when last 4 digits of the Aadhaar Numbers are same for at least 2 dependents, then second SMS to be sent as:
LOCKUID<SPACE>Aadhaar NUMBER-last 8-digits<SPACE>OTP-6-digits
LOCKUID<SPACE>Aadhaar NUMBER-last 8-digits<SPACE>OTP-6-digits
To Unlock Aadhaar
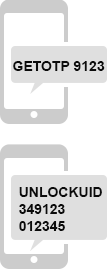
2 SMS are required to be sent for this facility.
SMS 1: GETOTP<SPACE>Virtual-ID-last-6-digits
SMS 2: UNLOCKUID<SPACE>Virtual-ID-last-6-digits<SPACE>OTP-6-digits
For example if Virtual ID is 1234-1234-1234-9123 then
SMS – GETOTP 9123and send it to 1947
SMS – GETOTP 9123and send it to 1947
If suppose you receive the OTP as "012345" then
SMS – UNLOCKUID 349123 012345 and send it to 1947
SMS – UNLOCKUID 349123 012345 and send it to 1947
Note:
(1) This service can be availed by passing Virtual ID ONLY
(2) In case of multiple Aadhaar Numbers linked to same mobile number, and when last 6 digits of the Virtual IDs are some for at least 2 dependents, then second SMS to be send as:
UNLOCKUID<SPACE>Virtual-ID-last-10-digits<SPACE>OTP-6-digits
UNLOCKUID<SPACE>Virtual-ID-last-10-digits<SPACE>OTP-6-digits
To Enable Biometric Lock

2 SMS are required to be sent for this facility.
In case if Aadhaar Number is used -
SMS 1: GETOTP<SPACE>Aadhaar-Number-last-4-digits
SMS 2: ENABLEBIOLOCK<SPACE>Aadhaar-Number-last-4-digits<SPACE>OTP-6-digits
For example if the Aadhaar number is 1234-5678-9123 then
SMS – GETOTP 9123 and send it to 1947
SMS – GETOTP 9123 and send it to 1947
If suppose you receive the OTP as "012345" then
SMS – ENABLEBIOLOCK 9123 012345 and send it to 1947
SMS – ENABLEBIOLOCK 9123 012345 and send it to 1947
In case if Virtual ID is used -
SMS 1: GETOTP<SPACE>Virtual-ID-last-6-digits
SMS 2: ENABLEBIOLOCK<SPACE>VIrtual-ID-last-6-digits<SPACE>OTP-6-digits
For example if Virtual ID is 1234-1234-1234-9123 then
SMS – GETOTP 340123 and send it to 1947
SMS – GETOTP 340123 and send it to 1947
If suppose you receive the OTP as "012345" then
SMS – ENABLEBIOLOCK 349123 012345 and send it to 1947
SMS – ENABLEBIOLOCK 349123 012345 and send it to 1947
Note:
(1) If Aadhaar is locked, then this service shall not be allowed to be availed
(2) In case of multiple dependent Aadhaar Numbers linked to same mobile number, and when last 4 digits of the Aadhaar Numbers are same for at least 2 dependents, then second SMS to be sent as
ENABLEBIOLOCK<SPACE>Aadhaar-Number-last-8-digits<SPACE>OTP-6-digits
(3) In case of multiple dependent Aadhaar Numbers linked to same mobile number, and when last 6 digits of Virtual ID are same for at least 2 dependents, then second SMS to be sent as:
ENABLEBIOLOCK<SPACE>Virtual-ID-last-10-digits<SPACE>OTP-6-digits
To Disable Biometric Lock

2 SMS are required to be sent for this facility.
In case if Aadhaar Number is used -
SMS 1: GETOTP<SPACE>Aadhaar-Number-last-4-digits
SMS 2: DISABLEBIOLOCK<SPACE>Aadhaar-Number-last-4-digits<SPACE>OTP-6-digits
For example if the Aadhaar number is 1234-5678-9123 then
SMS – GETOTP 9123 and send it to 1947
SMS – GETOTP 9123 and send it to 1947
If suppose you receive the OTP as "012345" then
SMS – DISABLEBIOLOCK 9123 012345 and send it to 1947
SMS – DISABLEBIOLOCK 9123 012345 and send it to 1947
In case if Virtual ID is used -
SMS 1: GETOTP<SPACE>Virtual-ID-last-6-digits
SMS 2: DISABLEBIOLOCK<SPACE>VIrtual-ID-last-6-digits<SPACE>OTP-6-digits
For example if Virtual ID is 1234-1234-1234-9123 then
SMS – GETOTP 340123 and send it to 1947
SMS – GETOTP 340123 and send it to 1947
If suppose you receive the OTP as "012345" then
SMS – DISABLEBIOLOCK 349123 012345 and send it to 1947
SMS – DISABLEBIOLOCK 349123 012345 and send it to 1947
Note:
(1) If Aadhaar is locked, then this service shall not be allowed to be availed
(2) In case of multiple dependent Aadhaar Numbers linked to same mobile number, and when last 4 digits of the Aadhaar Number are same for at least 2 dependents, then second SMS to be sent as:
DISABLEBIOLOCK<SPACE>Aadhaar-Number-last-8-
digits<SPACE>OTP-6-digits
digits<SPACE>OTP-6-digits
(3) In case of multiple dependent Aadhaar Numbers linked to same mobile number, and when last 6 digits of Virtual ID are same for at least 2 dependents, then second SMS to be sent as:
DISABLEBIOLOCK<SPACE>Virtual-ID-last-10-digits<SPACE>OTP-6-digits
To Temporarily Unlock Biometrics

2 SMS are required to be sent for this facility.
In case if Aadhaar Number is used -
SMS 1: GETOTP<SPACE>Aadhaar-Number-last-4-digits
SMS 2: UNLOCKBIO<SPACE>Aadhaar-Number-last-4-digits<SPACE>OTP-6-digits
For example if the Aadhaar number is 1234-5678-9123 then
SMS – GETOTP 9123 and send it to 1947
If suppose you receive the OTP as "012345" then
SMS – UNLOCKBIO 9123 012345 and send it to 1947
SMS – UNLOCKBIO 9123 012345 and send it to 1947
In case if Virtual ID is used -
SMS 1: GETOTP<SPACE>Virtual-ID-last-6-digits
SMS 2: UNLOCKBIO<SPACE>VIrtual-ID-last-6-digits<SPACE>OTP-6-digits
For example if Virtual ID is 1234-1234-1234-9123 then
SMS – GETOTP 340123 and send it to 1947
SMS – GETOTP 340123 and send it to 1947
If suppose you receive the OTP as "012345" then
SMS – UNLOCKBIO 349123 012345 and send it to 1947
SMS – UNLOCKBIO 349123 012345 and send it to 1947
Note:
(1) If Aadhaar is locked, then this service shall not be allowed to be availed
(2) In case of multiple dependent Aadhaar Numbers linked to same mobile number, and when last 4 digits of the Aadhaar Number are same for at least 2 dependents, then second SMS to be sent as:
UNLOCKBIO<SPACE>Aadhaar-Number-last-8-digits<SPACE>OTP-6-digits
(3) In case of multiple dependent Aadhaar Numbers linked to same mobile number, and when last 6 digits of Virtual ID are same for at least 2 dependents, then second SMS to be sent as:
UNLOCKBIO<SPACE>Virtual-ID-last-10-digits<SPACE>OTP-6-digits>
################################################################################
Iris Recognition Time Attendance & Access control system
Introduction
BioEnable is offering Iris recognition based Time Attendance & Access control system.
Why Iris Recognition ?
- Iris recognition technology offer Dual or Single eye capture and automatic identification again large databases in just 1-2 seconds.
- Iris recognition is considered more secure compared to fingerprint and other biometric technologies.
- Many people have improper fingerprints that are not suitable for fingerprint recognition systems. Iris is second best alternative to fingerprint.
- Children fingerprints are difficult to scan and can go thru changes overtime, making it not a suitable biometric identification. Iris is suitable for all ages.
- Eyes are highly protected part of the body and does not go thru much changes over the complete lifespan and good for long terms biometric recognition
- Iris recognition technology is worldwide used in National ID, Visa entry exit applications.

Iris Time Attendance system & Access Control System Features
- Dual Eye Iris capture camera
- 10 inch spill proof touchscreen
- Enhanced graphical user interface
- Store upto 10000 users (2 eyes each) and over 500000 logs
- Advanced access control mechanism with Door sensors, Fire alarm, Multiple Door lock controls
- Optional Face Recognition & Fingerprint recognition addons
Benefits
- High security identification
- Touchscreen multi-lingual interface
- Large user database
Applications
- Time Attendance recording in offices
- Access control at office, Banks
- Canteen management & Food coupon system
- Visitor management
- Members management at events
Aadhaar Enabled Biometric Attendance System (AEBAS)
What is AEBAS?
AEBAS stands for Aadhaar Enabled Biometric Attendance System. The purpose AEBAS system is to enable an employee with an Aadhaar Number, to mark his/her attendance in the government offices through Biometric Authentication device. For this purpose, Authentication Tablets/Desktop Authentication devices will be installed in each offices of the Central Ministries/Departments.
Features
- Biometric Attendance System based on Aadhaar Authentication (Fingerprint and Iris Based Authentication).
- Attendance System with real time monitoring.
- Comprehensive MIS.
- Lightweight System- Does not requires any special hardware or algorithm.
- Works on multiple platforms (Windows, Android, etc.) and form factors( Laptop, Desktop and Tablets, etc.).
- Robust System- Self sustained for small power cuts.
- Time taken to Record Attendance:
- *1-2 Seconds on Wi-Fi
- *8-11 Seconds on GPRS (SIM)
Advantages
Employee cannot ,
- Mark attendance in backdate
- Mark someone else’s attendance
- Tracks time of entry, exit hence MIS can track hours spent in office.
- Easy online registration
IMPORTANT
Abbreviations:
- All Android Versions (low or high), should be SAFETY NET PASSED AND UNROOTED.
- Standard Tablet Devices = 1) Android version 4.4 or above and 2) SafetyNet test passed and 3) unrooted
- Non-standard Tablet Devices = 1) Android version below 4.4 OR SafetyNet test failed OR rooted (Even in higher versions, if, the devices fail in safetynet or rooted, they are termed as Non Standard Devices).
- RD Service = Registered Device (with UIDAI) Service for Standard Tablet Devices.
- NSRD = Non standard RD (with UIDAI) services for non standard android tablet devices.
How it Works

AEBAS Application Screenshot (Desktop)

AEBAS Windows (Desktop ) Application is showing Bioenable device connected , Check above Screenshot.
AEBAS Application Screenshot (Tab/Mobile)


AEBAS Android App is showing Bioenable device connected , Check above Screenshot.
(Courtesy: https://www.bioenabletech.com/)
Steps to Install AEBAS and Other Necessary Software
1. On Android Tab or Mobile
- Download and Install RD Service app of your Fingerprint Device (for Mantra MFS Fingerprint Devices visit https://maahyraja.blogspot.com/p/jokes.html or http://basreports.attendance.gov.in/downloads/and download the RD service and AEBAS Client App)
- Install the RD Service App on your Tab or Mobile, connect FINGERPRINT SCANNER to your Mobile/Tab (ignore if already connected) and launch the App. Don't forget to have an active INTERNET CONNECTION on your Tab/Mobile. Wait till you see all three lines turn green.
- If the "Public Device Connected" shown on the app, then tap on "REGISTER" button to register your device. If registration becomes successful you will get a Flash Message of success. If Not, go to your Fingerprint Device vendor website and register the device there and make necessary PAYMENT and wait for your device to be REGISTERED DEVICE (in 24 Hours your device will turn REGISTERED DEVICE by UIDAI). and restart the Tab/Phone.
- Now, install AEBAS Client App and Launch the app. Choose your State and ask for ACTIVATION CODE from your District Nodal Officer. Enter Activation Code in the prescribed space and tap/click on Lock icon. Select your ENTRY POINT and confirm with the FINGERPRINT of DEVICE ADMIN by placing finger on admin on scanner when scanner is ready. After successful biometric confirmation your device will be ready for Aadhaar Enabled Biometric Attendance System
2. On Windows Desktop
Biometric Attendance System (BAS) Installation of RD Service Enabled Setup for Windows-Desktop Devices Register Device (RD) Services: UIDAI has introduced RD services in device installations as per latest security guidelines. Only those devices (vendors) that are registered with UIDAI will be authenticated.- To enable this facility, it is required to install RD Service tool and BAS device driver updating tool in the windows system. After successful installation of both services, attendance marking will be enabled. Present system will be discontinued in due course of time. To further information visit https://uidai.gov.in/images/resource/aadhaar_registered_devices_2_0_09112016.pdf
BAS Desktop Devices:
- Startek FM220
- ACPL Secugen
- HAMSTER PRO 20
- Mantra MANTRA MFS 100
- Morpho MSO 1300E2 (SAFRAN)
- Precision PBABAS300 / PB510
- IriShield-USB MK 2120U
Pre-Requisites for BAS Setup:
- BAS application will run on window 7 and above
- BAS version 2.1.0.3 will support registered devices
- Microsoft .Net framework 4.0 or higher version is required is your system.
- Windows administrative privileges are required.
- Antivirus software, if any, has to be disabled during installation process.
- Biometric device serial number must be registered at Vendor Management Server (If device serial number is not registered, please contact to vendor support).
- Activation code will be required from nodal officer login.
- Must be turn on your system location (GPS). Please visit the following link for instruction. http://basreports.attendance.gov.in/downloads/windows_location.pdf
- Should be correct date and time your system with Indian Time Zone.
RD Service Installation with Device driver:
- Uninstall Biometric device driver (if exists).
- Download the services and read RD installation guide with respect to your device models in below link.
- MANTRA SOFTECH (Model - MFS100): http://basreports.attendance.gov.in/downloads/assets/doc/soft/desktop/Drivers/Mantra_MFS100_RD_ services.zip
- ACCESS COMPUTECH (Model - STARTEK FM220 – ACPL): http://basreports.attendance.gov.in/downloads/assets/doc/soft/desktop/Drivers/StarTek_FM220_RD_ s ervice.zip
- SECUGEN CORPORATION (Model - HAMSTER PRO 20): http://basreports.attendance.gov.in/downloads/assets/doc/soft/desktop/Drivers/Secugen_RD_service. zip
- IRITECH INC. (IriShield-USB): http://basreports.attendance.gov.in/downloads/assets/doc/soft/desktop/Drivers/Iritech_RD_service.zip e. SMART CHIP PRIVATE LIMITED (Model - MORPHO/MSO 1300E2): https://www.morpho.com/en/biometric-terminals-contact
- PRECISION BIOMETRIC (Model - PB510): http://basreports.attendance.gov.in/downloads/assets/doc/soft/desktop/Drivers/Precision_5 10_RD_services.zip
- PRECISION BIOMETRIC (Model - PB ABAS 300): http://basreports.attendance.gov.in/downloads/assets/doc/soft/desktop/Drivers/Precision_PBABAS 300_RD_service.zip h. TATVIK Biosystem (Model – TMF20): http://basreports.attendance.gov.in/downloads/assets/doc/soft/desktop/Drivers/TATVIK_TMF20- RDService.zip
Installation of BAS client application version 2.1.0.3 (latest as on date 28/02/2018):
- After successful installation of RD Service,
- install BAS client setup from the below link - http://basreports.attendance.gov.in/downloads/assets/doc/soft/desktop/AEBAS_SETUP_DESKTOP/Aebas_RD_desktop_09_01_18.zip
- Open BAS client application 2.1.0.3 setup folder, Double-click on the Setup file.
- Click Next button to continue. Read the License agreement and accept to continue and click Next button to continue.
- Click Install button. Installation process will start.
- Click Finish button to complete installation wizard.
- Activation code is mandatory to configure device for BAS client application: To generate the activation code login your Attendance portal as a nodal officer. Note: Office Location, Device Location and Biometric device administrator (Device Admin: who will be authenticating device at device location) must be defined before generating activation code.
- Login as Nodal Officer Go to Admin Panel >> Manage Device Manage Device >> Activation Code Configuration of BAS device for attendance marking: Connect your biometric fingerprint/Iris device to your computer and then double click on the “BAS” icon on the desktop or go to start menu >> click BAS to open the BAS application.
- Application will open and bring the list of domains for selection.
- Select the domain where your attendance portal is registered. (Note: If you are not sure of the domain, please get in touch with the nodal officer/technical co-coordinator).
- Next window will discover attached device by RD services. Please wait for process completion.
- After discovering your device, it will ask for activation code.
- Enter the device activation code and click submit button.
- After activation code, verification next window will ask to select Entry Point/Device Location (location where the device will be installed).
- Select Entry Point and click Verify button Then, scan your biometric for authentication.
- On successful authentication, device will be activated.
- Restart the client and you can use for attendance marking. (Please tick the check box button to provide your consent to mark attendance and click OK button)
- If you want to save your consent in particular computer, click yes button Enter attendance ID and provide biometric.
- You can click on Menu link to latest check updates, announcement, device de-register.
- Menu >> Check updates Menu >> Announcement Menu >> Device De-Register Click Helpline button for NIC service desk website and helpline number
For any Aadhaar related query, Call Toll Free No 1947
- To find your Lost Aadhaar Number (UID) or Enrollment Number (EID), you need to enter your Name and Phone Number/Email (that you have provided at the time of Aadhaar Registration).
- To check the Aadhaar Status simply enter your details in the prescribed fields.
- To UPDATE AADHAAR DATA: To update Aadhaar data i.e. Name, Parentage, Address, email etc tap/click the link and fill in the prescribed fields. (Note: Mobile Number in Adhaar Data is mandatory to avail this service Online)
- You can update your Aadhaar address to where you are presently residing, with the consent and authentication of the address verifier (a family member, relative, friends, and landlord) who is willing to let you use their address as proof. UIDAI shall send an Address Validation Letter to the address, which could be used for online update. Use THIS LINK to to send Address verification Request.
- In case your Mobile Number is not available in your Adhaar Data you have to update your Adhaar data Offline by Filling THIS FORM and send to the address mentioned in the form.
- To DOWNLOAD YOUR E-AADHAAR, fill in the required information and click "download". Aadhaar in .pdf format will be downloaded into your Mobile/PC memory and you can open the pdf file by entering the your PIN CODE as the PASSWORD.
Happy to found this blog. I have some facts related to this blog and I would like to share with all its readers. Definitely it is going to help everyone and aware people with some more knowledgeable points.
ReplyDeleteZKteco products in nigeria
ReplyDeleteNice Article,We are a technology driven giant who controls solutions to meet the
diverse needs of customers. By offering the Biometric Attendance Machine Essl Biometric Attendance Machine
Nice information, eSSL Biometric Door Access Control System are specifically designed to ensure 100% prevention from unwanted admissions. With these door access control systems, only the people having access to the specific space are allowed to enter. Biometric Attendance System
ReplyDeleteThanx everyone for thanking me for the post
ReplyDeleteNice Article,You should need to keep your fortune as a keepsake of your diligent work or ventures, but on the off chance that not you can go to an antique vendor student of history or even a historical center to have it assessed. Biometric attendance machine supplier
ReplyDeleteBAS client application version 2.1.0.3 (latest as on date 28/02/2018): is not download
ReplyDeleteVisit https://basreports.attendance.gov.in/downloads/ to download any software related to BAS
ReplyDeleteNice Article,Biometric attendance systems are smart devices that record the working days, in-time, and out-time of all the employees, Biometric attendance machine
ReplyDeleteNice Article,thanks for sharing such nice article, Biometric attendance machine system
ReplyDeleteVery nice article, Biometric access control systems like fingerprint access control system offer a superior level of security than other access control systems biometric attendance machine Thanks for sharing such information
ReplyDeleteThanx for your appreciation.......
ReplyDelete